Feign 是一个声明式的伪RPC的REST客户端,它用了基于接口的注解方式,很方便的客户端配置,刚开始使用时还不习惯,感觉是在客户端写服务端的代码,Spring Cloud 给 Feign 添加了支持Spring MVC注解,并整合Ribbon及Eureka进行支持负载均衡。
Feign的使用很简单,有以下几步:
1、添加依赖
2、启动类添加 @EnableFeignClients 注解支持
3、建立Client接口,并在接口中定义需调用的服务方法
4、使用Client接口。
具体如下:
1、添加 spring-cloud-starter-openfeign 依赖
<dependency>
    <groupId>org.springframework.cloud</groupId>
    <artifactId>spring-cloud-starter-openfeign</artifactId>
</dependency>
完整的 pom.xml
<?xml version="1.0" encoding="UTF-8"?>
<project  xmlns_xsi="http://www.w3.org/2001/XMLSchema-instance"
         xsi_schemaLocation="http://maven.apache.org/POM/4.0.0 http://maven.apache.org/xsd/maven-4.0.0.xsd">
    <modelVersion>4.0.0</modelVersion>

    <groupId>com.antma</groupId>
    <artifactId>eureka-call-client</artifactId>
    <version>0.0.1-SNAPSHOT</version>
    <packaging>jar</packaging>

    <name>eureka-call-client</name>
    <description>Demo project for Spring Boot</description>

    <parent>
        <groupId>org.springframework.boot</groupId>
        <artifactId>spring-boot-starter-parent</artifactId>
        <version>2.0.2.RELEASE</version>
        <relativePath/> <!-- lookup parent from repository -->
    </parent>

    <properties>
        <project.build.sourceEncoding>UTF-8</project.build.sourceEncoding>
        <project.reporting.outputEncoding>UTF-8</project.reporting.outputEncoding>
        <java.version>1.8</java.version>
        <spring-cloud.version>Finchley.RELEASE</spring-cloud.version>
    </properties>

    <dependencies>
        <dependency>
            <groupId>org.springframework.boot</groupId>
            <artifactId>spring-boot-starter-web</artifactId>
        </dependency>
        <dependency>
            <groupId>org.springframework.cloud</groupId>
            <artifactId>spring-cloud-starter-netflix-eureka-client</artifactId>
        </dependency>

        <dependency>
            <groupId>org.springframework.cloud</groupId>
            <artifactId>spring-cloud-starter-openfeign</artifactId>
        </dependency>

        <dependency>
            <groupId>org.projectlombok</groupId>
            <artifactId>lombok</artifactId>
        </dependency>

        <dependency>
            <groupId>org.springframework.boot</groupId>
            <artifactId>spring-boot-starter-test</artifactId>
            <scope>test</scope>
        </dependency>
    </dependencies>

    <dependencyManagement>
        <dependencies>
            <dependency>
                <groupId>org.springframework.cloud</groupId>
                <artifactId>spring-cloud-dependencies</artifactId>
                <version>${spring-cloud.version}</version>
                <type>pom</type>
                <scope>import</scope>
            </dependency>
        </dependencies>
    </dependencyManagement>

    <build>
        <plugins>
            <plugin>
                <groupId>org.springframework.boot</groupId>
                <artifactId>spring-boot-maven-plugin</artifactId>
            </plugin>
        </plugins>
    </build>

</project>
2、启动类添加 @EnableFeignClients 注解支持
@SpringBootApplication
@EnableDiscoveryClient
@EnableFeignClients
public class EurekaCallClientApplication {

    public static void main(String[] args) {
        SpringApplication.run(EurekaCallClientApplication.class, args);
    }
}
3、建立Client接口,并在接口中定义需调用的服务方法
package com.antma.eurekacallclient.client;

import org.springframework.cloud.openfeign.FeignClient;
import org.springframework.web.bind.annotation.GetMapping;

@FeignClient(name = "CLIENT")
public interface TestClient {

    @GetMapping("/getMsg")
    public String getMsg();

}
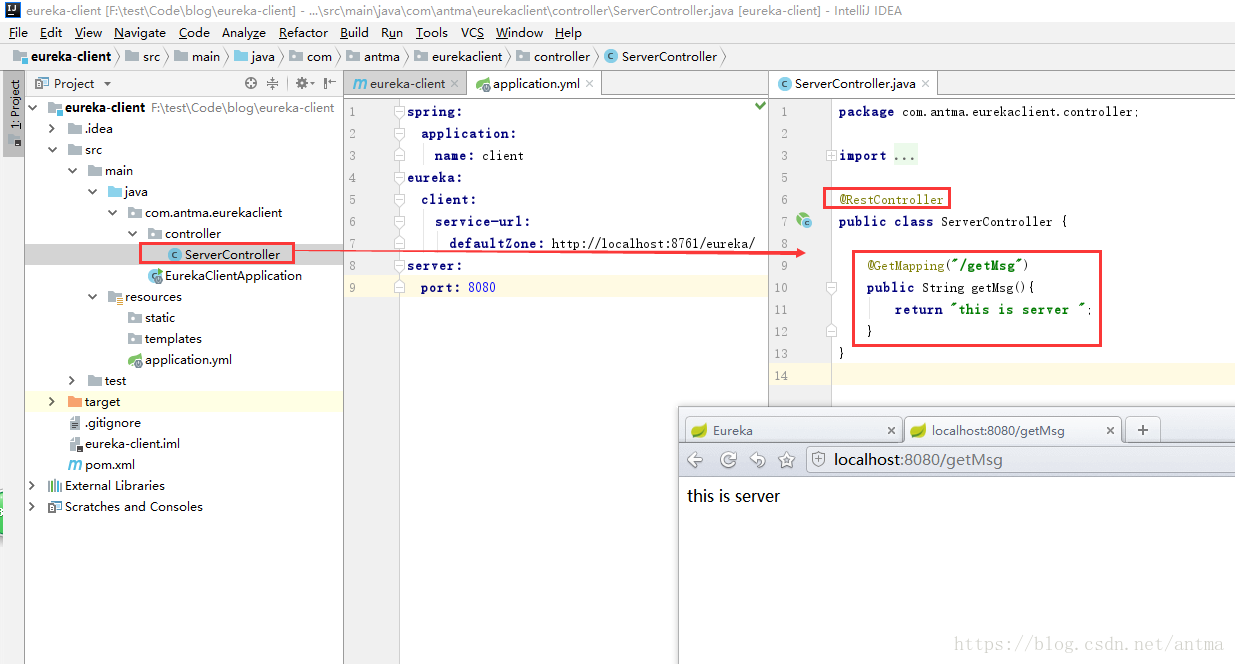
说明:>> name=”CLIENT”,这里的”CLIENT”是注册到Eureka 中的要调用的应用名
>> @GetMapping(“/getMsg”) 这里的“getMsg”是要调用的应用里的相应的方法(这里需注意,如果CLIENT服务下面的访问路径是 /list/getMsg ,则这里也要写”/list/getMsg”)。
4、使用Client接口
package com.antma.eurekacallclient.controller;

import com.antma.eurekacallclient.client.TestClient;
import lombok.extern.slf4j.Slf4j;
import org.springframework.beans.factory.annotation.Autowired;
import org.springframework.web.bind.annotation.GetMapping;
import org.springframework.web.bind.annotation.RestController;

@RestController
@Slf4j
public class ClientController {

    @Autowired
    private TestClient testClient;

    @GetMapping("getServerMsg")
    public String getServerMsg() {
        String result = testClient.getMsg();
        log.info("result={}", result);

        return result;
    }
}
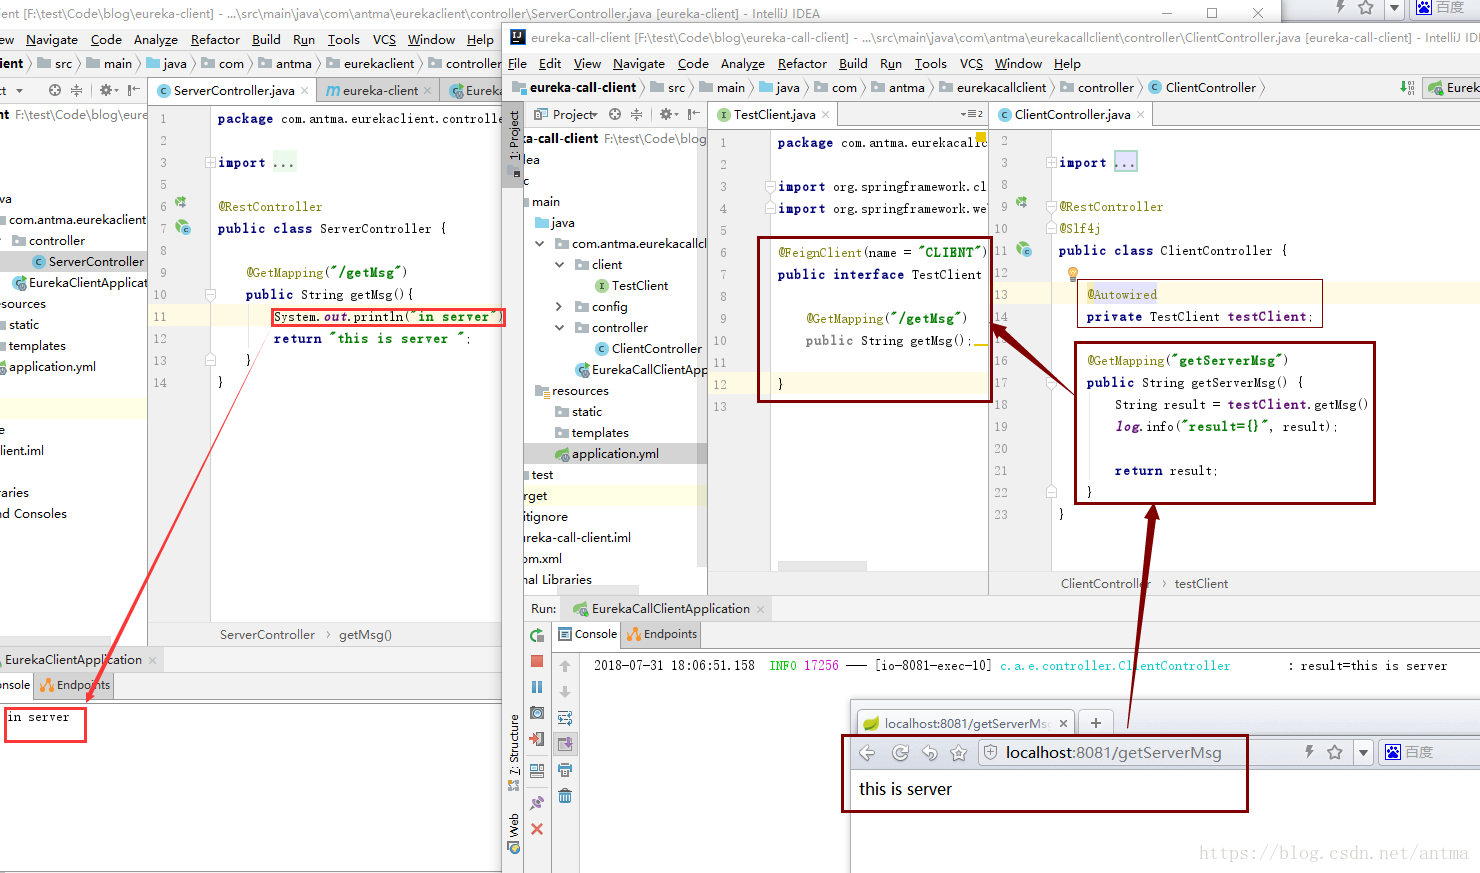
使用上面定义的 TestClient 接口,直接调用其方法即可,附两张图:
Eureka中注册的两个服务,CLIENT 为要调用的应用,CALL-CLIENT为调用者。

下面是浏览器访问后的结果:

 老麻
老麻